Mastering basic electrical appliance repair is an essential skill for homeowners in 2026, empowering you to handle minor malfunctions like broken cords, blown fuses, and faulty switches without the need for expensive professional services. When a household appliance suddenly loses power, the culprit is often a simple mechanical failure rather than a complex internal circuit board issue. By learning to identify and fix these common electrical problems safely, you can extend the lifespan of your devices, save significant money on replacements, and reduce environmental waste. Always remember that safety remains the absolute priority; before touching any internal components, you must unplug the device from the power source to eliminate the risk of electrical shock. With a few basic tools and a bit of patience, you can master these fundamental repair techniques with ease.
Essential Safety Protocols for DIY Repairs
Before beginning any repair work on your home appliances in 2026, you must establish a rigorous safety routine to prevent injury. The primary rule of electrical maintenance is simple: if the device is plugged in, it is potentially dangerous. Never assume that a switch in the off position guarantees safety, as internal wiring configurations can sometimes retain a live current if the appliance is incorrectly wired or if the switch only controls the neutral wire. Always visually inspect the power cord for signs of fraying, cracking, or exposed copper wires before you even consider opening the appliance casing. If you are uncertain about the internal structure of a high-voltage appliance, do not hesitate to seek guidance from authoritative resources like the Consumer Product Safety Commission to understand standard safety regulations.
- How to fix a refrigerator that won't cool: Step-by-step diagnostic and repair guide
- Built to Last: Durable Tool Selection for Residential Maintenance
- Practical DIY Repair Guide for Small Household Appliances
- Common Appliance Failures: Troubleshoot & Fix Them Fast
- Advanced home repair tools: A complete guide to expert usage, safety, and techniques
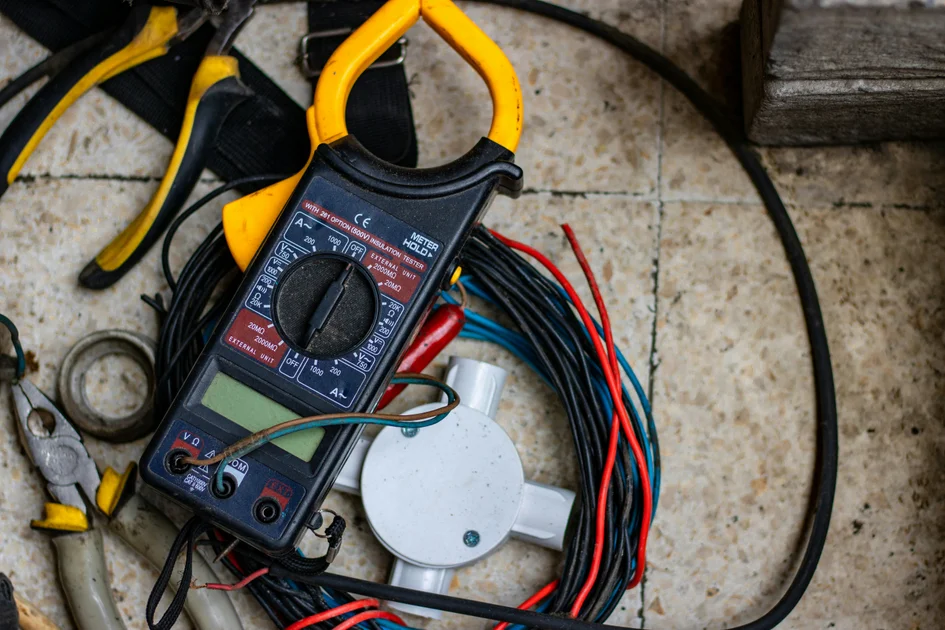
In addition to disconnecting the power, utilize the right tools to minimize risks. Invest in an insulated screwdriver set and a reliable digital multimeter to test for continuity. A multimeter is indispensable in 2026 for verifying whether a circuit is truly broken or if a component is still conducting electricity. When working with delicate electronics, wear rubber-soled shoes and ensure your workspace is dry and well-lit. Avoid working on damp surfaces, as water significantly increases the conductivity of the floor, turning a minor mistake into a lethal hazard. If you ever feel overwhelmed or if the internal damage appears charred, melted, or smells like ozone, stop immediately. Professional repair is always preferable to risking a fire or a severe electrical shock during an amateur attempt.
Repairing Damaged Power Cords
Frayed or severed power cords represent one of the most common reasons appliances stop working, yet they are remarkably straightforward to repair. If the damage is superficial, such as a small cut in the outer insulation, high-quality electrical tape can provide a temporary seal. However, if the inner conductors are exposed or severed, you must replace the damaged section entirely or install a new plug head. Start by cutting the cord several inches past the damaged area to ensure you are working with clean, uncompromised wire. Use a wire stripper to remove about half an inch of the outer jacket, then strip the individual wires to expose the copper strands. Twist these strands tightly to prevent fraying when you secure them under the terminal screws.
When reattaching a plug, it is vital to understand the color coding of wires. Generally, the green or bare copper wire is the ground, the white wire is the neutral, and the black or brown wire is the hot lead. Ensure that these are connected to their respective terminals; a miswired plug can turn the exterior casing of an appliance into a live conductor, creating a major safety hazard. Once connected, tug gently on the wires to ensure they are firmly seated. Before plugging the device back into the wall outlet, use your multimeter to check for a short circuit between the hot and neutral prongs. Taking these extra steps ensures that your 2026 DIY repair is not only effective but also compliant with modern safety standards for household electronics.
Troubleshooting Fuses and Switches
When an appliance suffers a sudden loss of power, the internal fuse is often the first component to check. Fuses are designed as sacrificial safety devices that blow when too much current flows through them, effectively protecting the rest of the appliance from permanent damage. To test a fuse, remove it from its housing and set your multimeter to the continuity setting. If the multimeter emits a tone or shows a near-zero resistance value, the fuse is still good. If there is no reading, the fuse is blown and must be replaced with one of the exact same amperage and voltage rating. Never bypass a fuse by wrapping it in foil or using a wire jumper, as this removes the critical safety layer designed to prevent electrical fires.
Testing Internal Toggle Switches
Faulty switches are another frequent cause of appliance failure. Over years of use, the internal springs and contacts within a switch can wear out or become coated in oxidation, leading to intermittent power delivery. To test a switch, disconnect the appliance and remove the switch from its mounting. With the multimeter probes on the switch terminals, flip the toggle back and forth. You should see the continuity reading switch between infinite resistance and zero resistance. If the reading remains constant regardless of the toggle position, the switch is defective and needs a direct replacement. Ensure you purchase a switch that matches the original manufacturer specifications to maintain the appliance’s intended performance levels and safety profile throughout 2026.
Comparison Table / Specifications Table
| Repair Feature | Simple Cord Fix | Fuse Replacement | Switch Swap |
|---|---|---|---|
| Difficulty Level | Beginner | Beginner | Intermediate |
| Required Tools | Wire Strippers | Multimeter | Screwdriver/Soldering |
| Primary Risk | Short Circuit | Wrong Amperage | Wrong Wiring |
| Cost Estimate | $5 – $10 | $2 – $5 | $10 – $20 |
| Safety Priority | High | Very High | High |
| Time Required | 15 Minutes | 10 Minutes | 30 Minutes |
Pros and Cons Analysis
Performing your own electrical repairs offers a distinct set of advantages and disadvantages that every homeowner should weigh. The primary benefit is cost-efficiency; simple parts like fuses and switches cost mere dollars compared to the high hourly rates charged by professional technicians. Furthermore, DIY repairs foster a deeper understanding of how your household items function, which leads to better maintenance habits and longer product lifespans. This hands-on approach is also highly sustainable, as it discourages the “throw-away” culture that dominates the 2026 consumer landscape. By fixing a cord instead of discarding the appliance, you prevent unnecessary electronic waste from entering local landfills, contributing to a more circular and environmentally conscious home economy.
Conversely, the drawbacks involve potential risks and time investment. Electrical work, while simple on the surface, carries inherent dangers if the person performing the repair is inexperienced or careless. A mistake in wiring could lead to a house fire or a dangerous shock, which far outweighs any money saved on a repair bill. Additionally, some modern appliances are designed with proprietary screws or glued-together casings that make them nearly impossible to open without damaging the exterior. There is also the issue of warranty voiding; many manufacturers state that opening the appliance casing for any reason nullifies your protection plan. Always verify your warranty status before attempting any repair, and weigh the cost of a potential repair against the benefit of professional support.
Key Takeaways
- Always disconnect the power supply completely before opening any appliance chassis.
- Use a digital multimeter to verify the health of fuses and the functionality of switches.
- Never attempt to bypass a fuse or circuit breaker, as this creates a severe fire hazard.
- Match replacement parts exactly to the original manufacturer specifications for safety.
- Document your disassembly process with photos to ensure correct reassembly.
- Seek professional help immediately if you detect burning smells or see charred components.
Frequently Asked Questions
Can I use any fuse as a replacement?
No, you must use a fuse with the exact same amperage and voltage rating as the original. Using a fuse with a higher rating can lead to overheating and fire, while a lower rating will cause the fuse to blow immediately.
How do I know if my multimeter is working?
Touch the two probes together before testing a component. If the multimeter is functional and set correctly, it should display a zero or near-zero reading or emit a beep, indicating a continuous circuit.
Is it safe to repair cords with electrical tape?
Electrical tape is only a temporary fix for minor insulation damage. If the copper wires are exposed or the cord is frayed, you should replace the cord or the plug end to prevent electrical shocks.
Why does my appliance still not work after a switch replacement?
If you have replaced the switch and the appliance still fails, the problem may lie deeper within the motor, the circuit board, or a loose internal connection that you might have missed during inspection.
Does DIY repair void my appliance warranty?
Most manufacturers consider unauthorized opening of an appliance a violation of the warranty agreement. Always check your specific product manual or contact the manufacturer before starting any DIY repairs in 2026.
Conclusion
Repairing your own household electrical appliances is a rewarding endeavor that blends technical skill with practical frugality. By mastering the basics—such as replacing power cords, swapping out blown fuses, and testing faulty switches—you become more self-reliant and better equipped to manage your home in 2026. While the complexity of modern technology continues to evolve, the fundamental principles of electrical safety and circuit continuity remain constant. Treat every repair with the respect it deserves, prioritize your safety above all else, and don’t be afraid to consult professional resources when a task exceeds your current skill set. With practice, you will find that most appliance “deaths” are merely temporary interruptions waiting for a quick, expert fix.